
Power Apps Forms Tips and Tricks – Part 2
Hello everyone, welcome to the second in this series of articles where I provide you with many of the Tips and Tricks I commonly use when utilising Power Apps Forms.
You can view Part 1 of my Power Apps Forms Tips and Tricks here
Tip #3 – Don’t use the Title field
Seriously, save yourself the time, effort and hassle that will come later.
This tip isn’t just specifically for Power Apps forms, it’s good advice. You may be asking why not use it? Well, (since this Tip only applies to those of us using SharePoint lists) there’s a number of reasons, the first is that many of the Power Apps functions still require the ‘Original’ column name, so while it might be fresh in your mind now that the renamed column ClientReferenceText is actually Title, it may not be as fresh 6 months or more down the line if you have to do any edits and can’t understand why your function is trying to Sort by the Title field and what you used that for.
Another good reason not to use it – it is no longer required. For quite some time now, you have been enable to create a SharePoint list that does not have a single required column.
Here’s a quick guide on setting this field to Not Required:
STEPS:
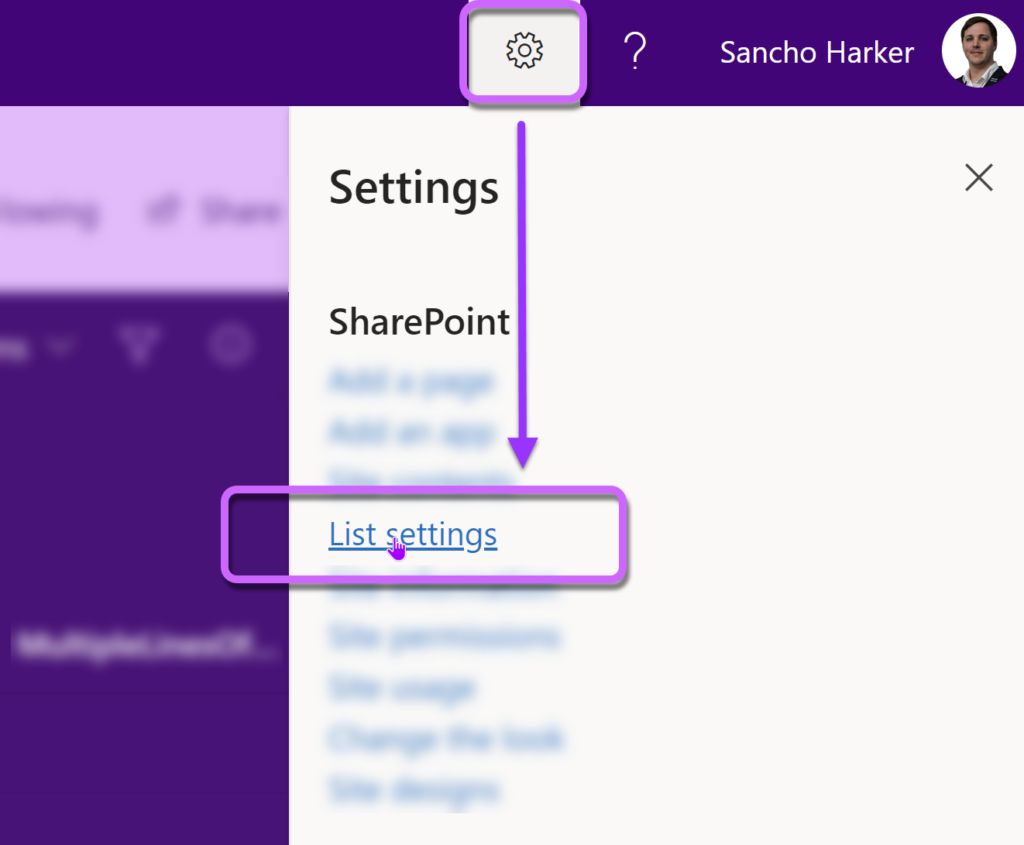
Go to your list, Click the Cog and then List Settings:
Scroll down until you see the list of Columns and click on the name Title:
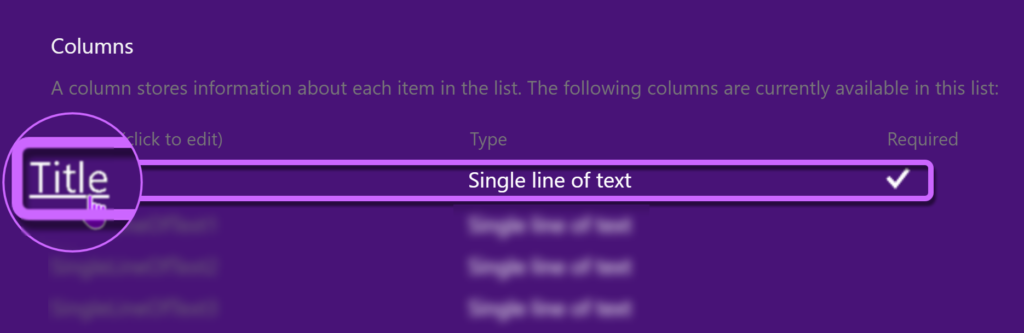
In the settings for that column, Select ‘No’ in the Required setting:

Click ‘OK’ on the bottom of that page.
Now your list no longer needs a Title, and now neither do your Power Apps!
Tip #4 – Reference controls directly in Datacard Update
As I showed in my previous set of tips you can use custom controls in your datacards to replace the functionality of your text fields and make them more interactive.
What we did in that post was to use a custom control to manipulate a text field. The major advantage of this, is you can then filter by these fields easily and worry less about delegation.
Now the next part of this tip is for those of you who are a bit more brave or aren’t so worried about debugging. Instead of referencing the text field in our Datacard’s Update property, we can actually point the Update property directly to the control’s Value.
In my previous blog post we pointed the text field’s Default value to the custom control via a formula, now instead of doing that we can take that exact same formula and paste it into the Update field for that Datacard, then get rid of the text field control altogether.
Trick #3 – Change smaller dropdowns to galleries
I previously showed how to replace text fields with a selectable gallery of items. If you are using a dropdown or a single-selection combobox with 6 or less items, you can use the same principal from my last post and replace those controls with a selectable gallery.
STEPS:
All we need to do is copy that existing gallery we created into this datacard, and then copy the Items property from your existing choice control and place it in the Items property of the gallery:
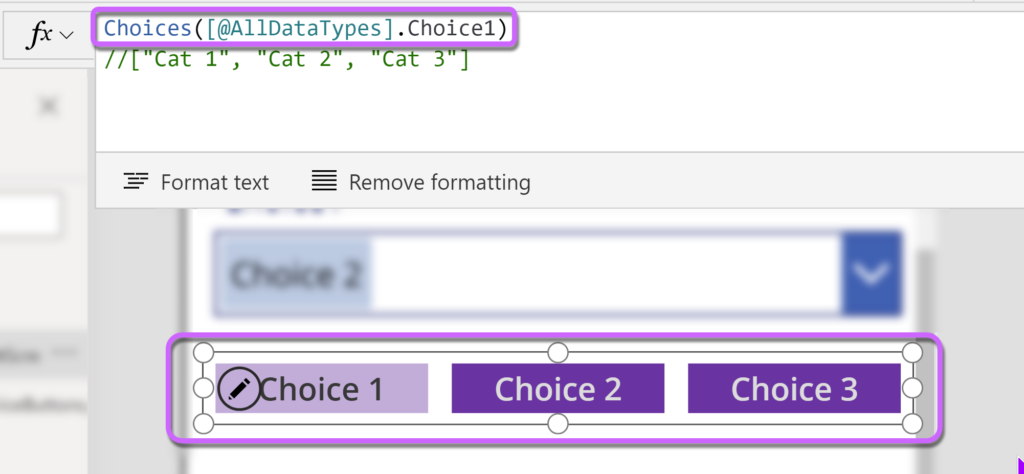
Then we change the Default of the gallery as it no longer had ‘Value’ as its item:

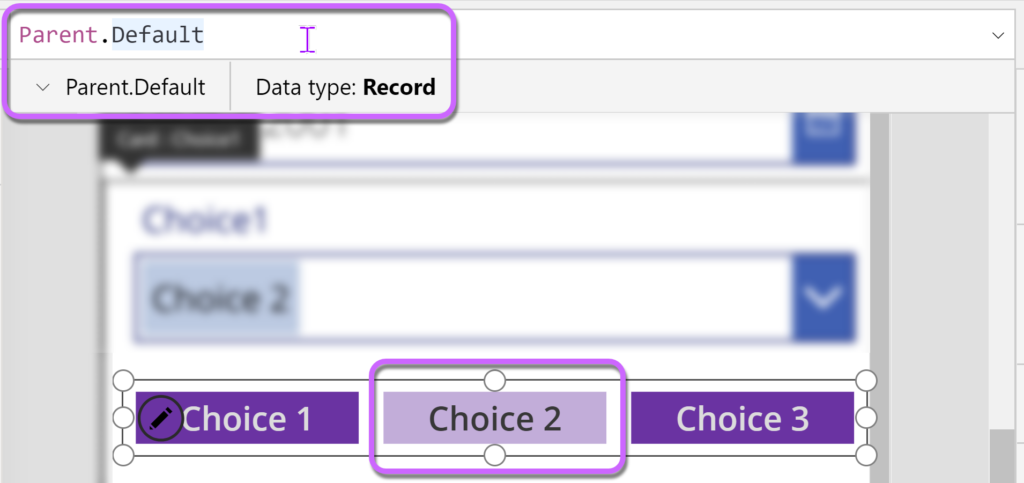
Then we point the Update field for the Datacard to:
{Value: glr_ChoiceButtons_EditScreen_2.Selected.Value}
(we do this as its looking for a record to update with, as choice fields are a record)
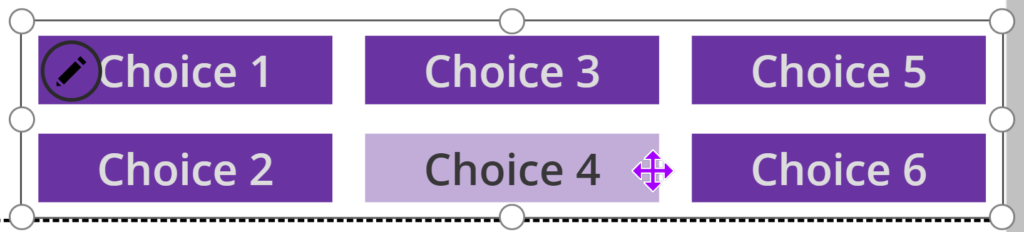
If I add 3 more choices to the column and we want to show more than 3 items we can change one or two properties.
We increase the wrap property, which will increase the number of items wrapped vertically (as its a horizontal gallery), before it wraps horizontally again:

Then you can see that there’s now no longer a gap around the text as its compressed the two rows into the original gallery’s height.
We can fix this by doubling the gallery’s height (as we have double the rows):
Replacing those controls with a selectable gallery allows your users to see all of your options immediately and makes their choices a single-click action instead of ‘Click-Dropdown > Click-Item’.
Tip #5 – Use accessible colours and backgrounds
When building your form, you should always make sure that your text and your background colours are sufficiently contrasted. Try not to use any colours that are too similar either. This is not only a great idea to create your Apps as ‘Accessible by design’, but it also makes it quicker for people to use your Apps as their response time to properly contrasted items has been proven to be quicker and more attentive.
You can check whether your colours are accessible taking a screenshot and pasting it into the colour blindness simulator or you can use this WCAG checker to enter your text colour and its surrounding Fill/Colour to see whether it is WCAG-compliant. The Web Content Accessibility Guidelines (WCAG) provide helpful recommendations on how to make your web content more accessible.
Tip #6 – When adding columns to your datasource while Editing your App
If you edit your data source’s columns, many times the editor doesn’t pick up the new column and you won’t be able to add it to a Form (and your formulae won’t detect it either).
Refresh the datasource manually within Power Apps to see the new column, if it is still not visible or you are not able to add it to a Form, then save and close the App and then close the browser tab. After reopening the app the new column should be detected correctly by the editor.
Tip #7 – Add delegable text-searching for your non-text columns
Some columns, such as Person columns, can’t have their contents searched via delegation as they are complex data types (delegation is where the datasource performs the search and then returns the filtered data back to the App).
We can add this via a workaround.
When creating your Person column, create an additional single-text column and give it a name like PersonColumnName_Email_Text to easily identify it. Then in your App, have your form include this second datacard and its text value set to the PeoplePickerControl.Selected.Email – this way when you filter the gallery later, you can filter by something like:
PersonColumnName_Email_Text = drp_ChosenUser.Selected.Email
(as we are now comparing text email against text email instead of trying to delegate the complex data of a Person field).
That’s all the Power Apps forms Tips and Tricks for this post as I don’t want to overload anyone.
If you liked Part 2 be sure to follow me on Twitter for notifications about the upcoming parts.
You can find my other posts about Power Apps here.